See the floor in your own kitchen before it is laid
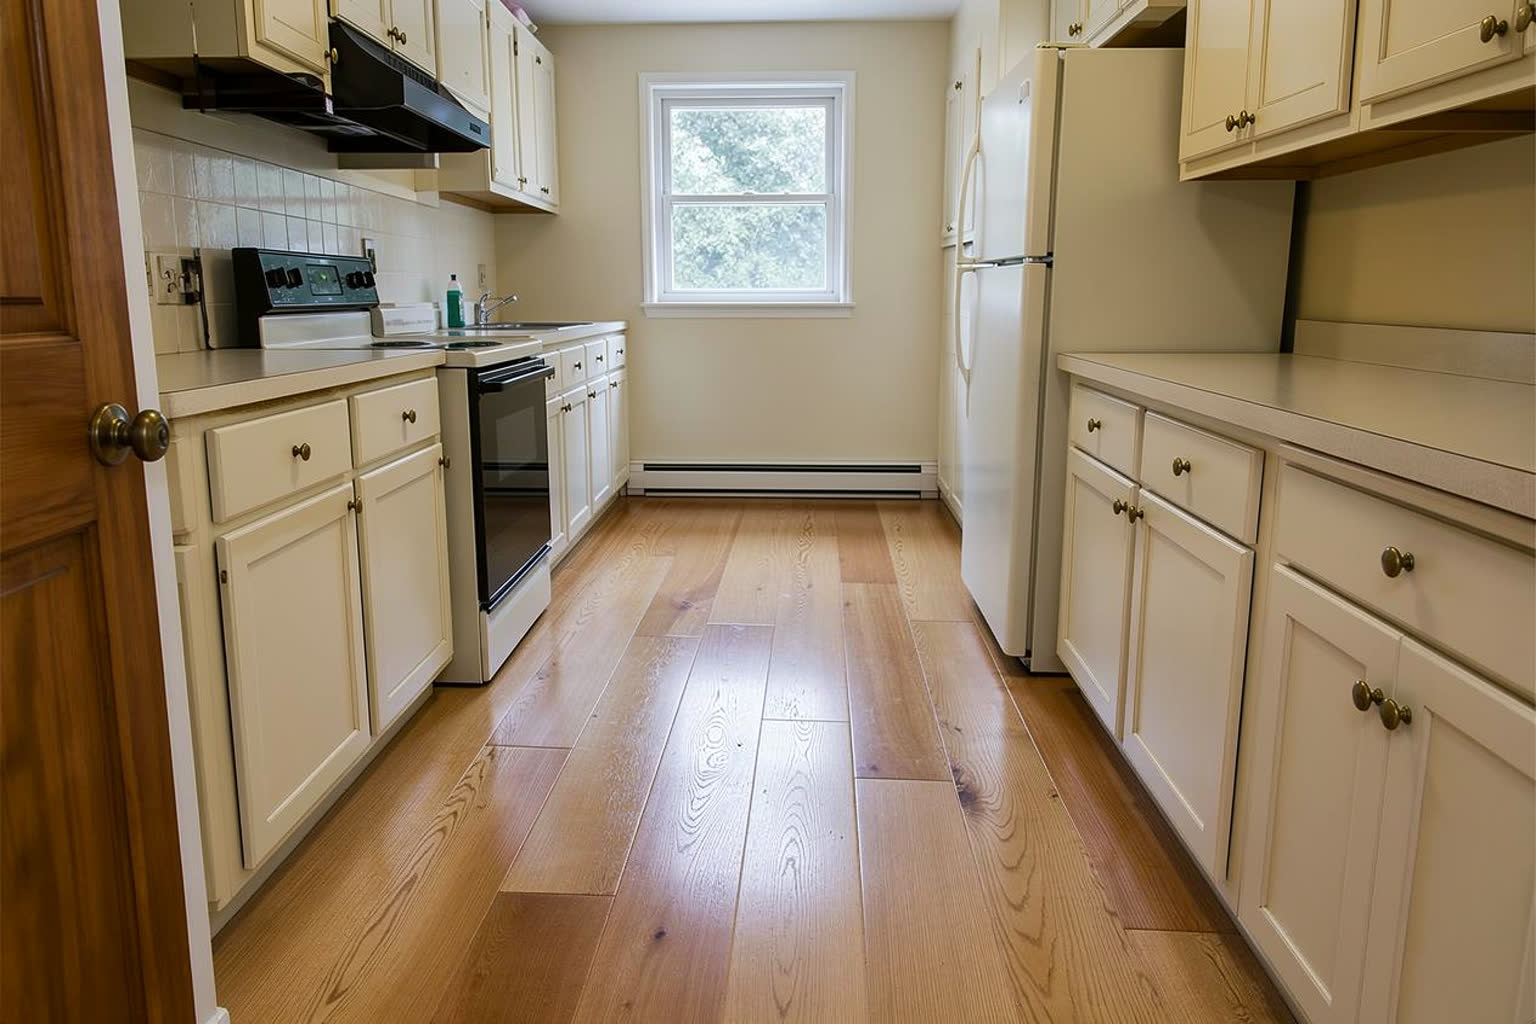
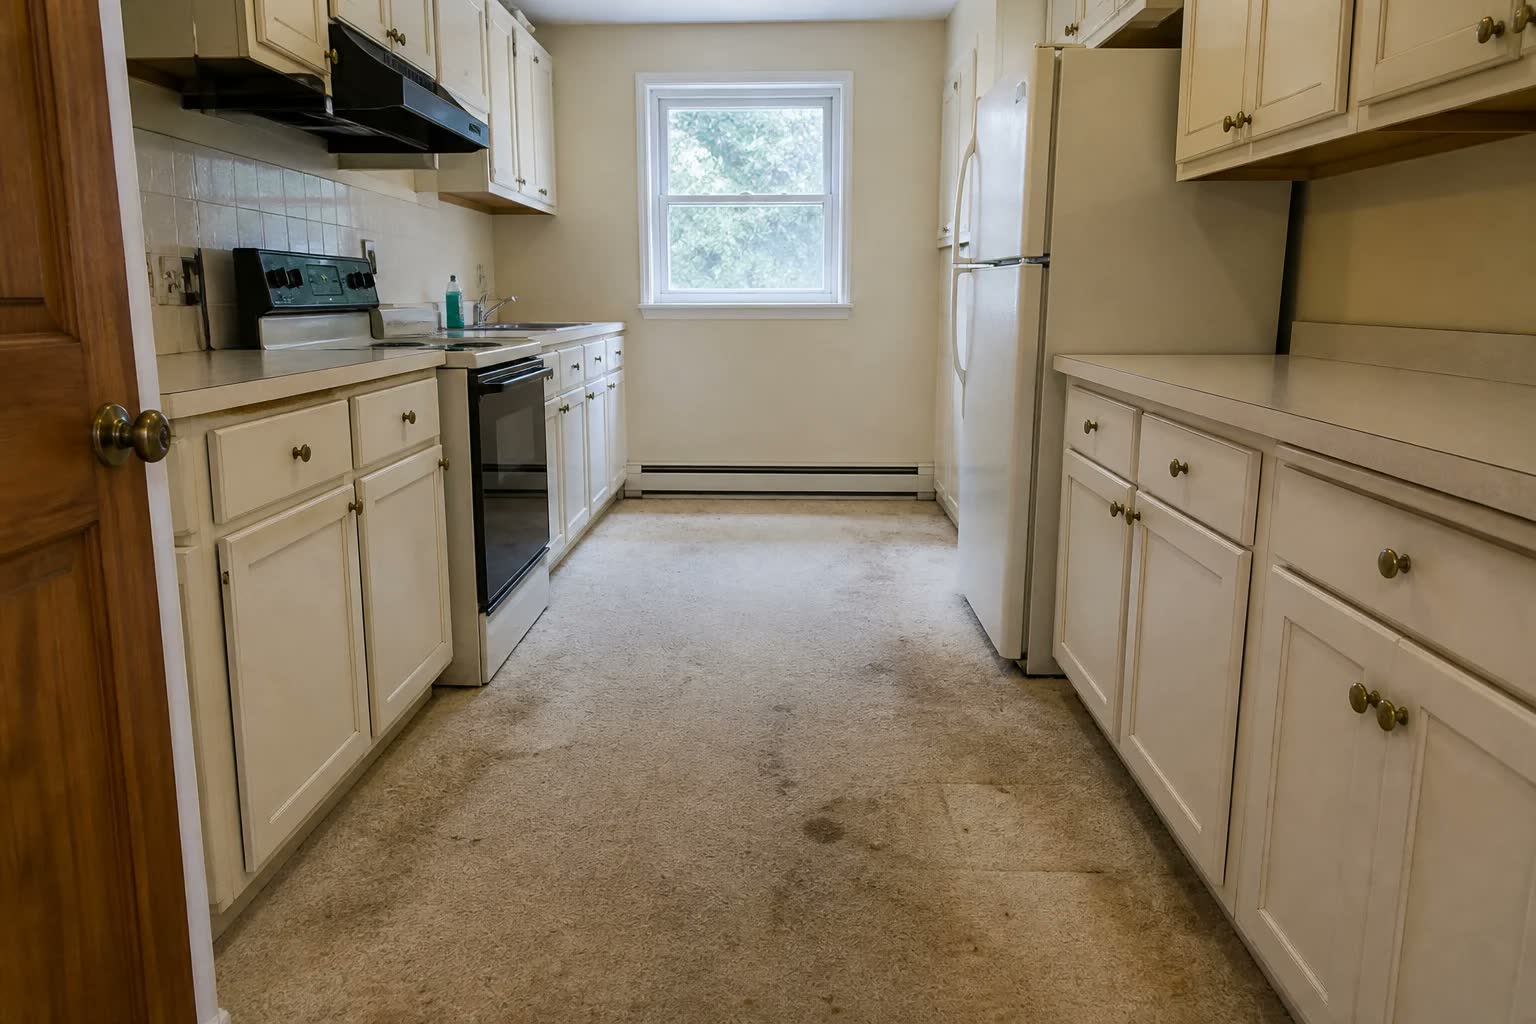
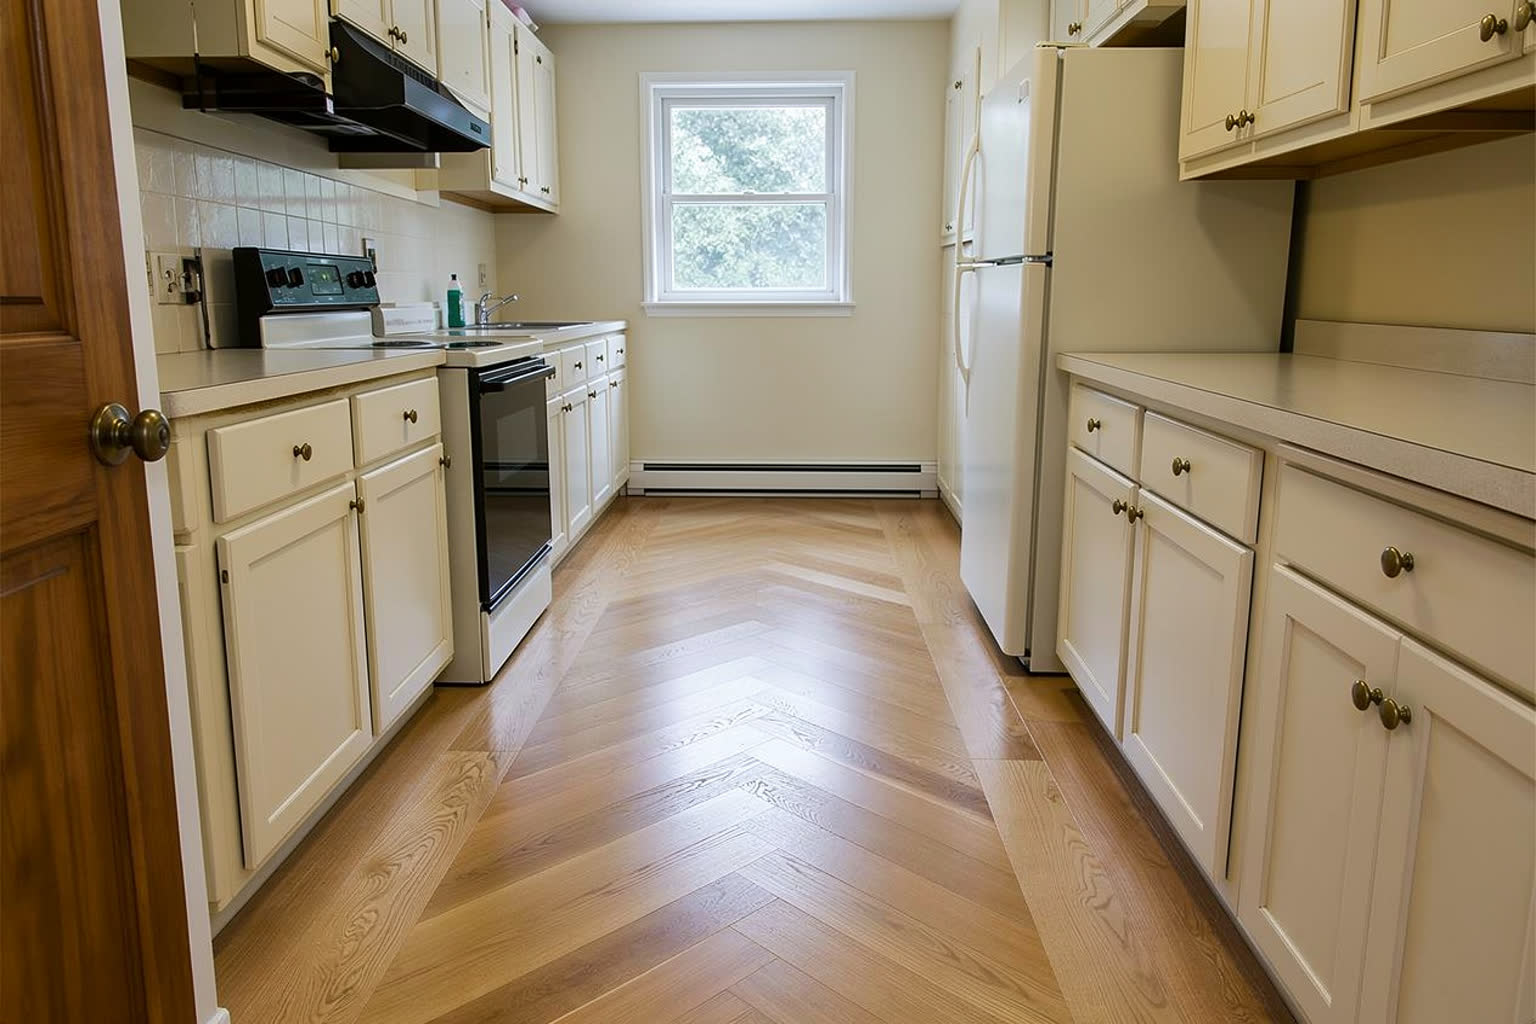
See flooring in a real kitchen instead of on a sample board. Every picture on this page is the same room with a different floor down, and everything above it left alone. To put a floor in your kitchen, upload a photo on the home page.
How it works on your own kitchen
A photo of a single plank or tile is enough. So is a sample board in the store.
It finds the floor plane and lays the material in the right perspective.
Opens the tool on the home page. Bring one photo of your kitchen.
What this tool actually does
Change Flooring takes two images. The first is a photograph of your kitchen. The second is the floor you are considering, which can be a photo of a single plank, one tile, or a sample board in a store.
It finds the floor plane on its own and replaces only that. The material is projected in the correct perspective for your photo, at a realistic plank or tile scale, and tiled seamlessly across the room. The lighting you already have, the shadows falling across the floor and any reflections are preserved.
Rugs, toe kicks, appliance bases and furniture legs are excluded from the swap. They sit correctly on top of the new floor instead of being tiled over. Everything above the floor stays pixel-identical.
The largest surface, chosen from the smallest sample
The floor is the biggest single surface in a kitchen. It is also the one most often chosen from the smallest piece.
You are handed one plank, about the size of a ruler, or a tile you can hold in one hand. From that you have to decide about twenty square meters.
Three things go wrong on the way from the sample to the room.
Tone builds. A plank that reads as a gentle mid-brown in your hand reads considerably darker across a whole floor, because you are seeing hundreds of them at a shallow angle rather than one flat piece at arm's length. Warm floors get warmer. Gray floors often turn out colder than expected.
Pattern appears. One plank has no repeat. Twenty square meters does. Knots, grain and color variation that looked characterful on a sample can look busy at full size, and cheaper laminates repeat their pattern often enough that once you see it you cannot unsee it.
Direction changes the room. Planks running the length of a kitchen stretch it. Running across, they widen it. Herringbone does something different again, and it changes the perceived proportions of the room more than any other choice on this list. None of that is visible in a sample.
A floor is also the most disruptive thing in a kitchen to change your mind about. Cabinets can be repainted in a weekend. A floor usually means clearing the room, lifting what is there, and living around it. On a project with a median cost of $55,000, this is not the surface to guess at.
How it works
1. Upload a photo of your kitchen. Take it from the doorway if you can, looking down the room, so the floor fills the lower part of the frame. The more floor in the photo, the more useful the result.
2. Photograph the floor. One plank or one tile is enough. Shoot it flat and in daylight. Floor samples photographed under warm store lighting come out noticeably more yellow than they really are, which is the single most common reason a floor disappoints at home.
3. Look at the whole floor. You get your kitchen back with that floor laid, in the right perspective, with your table legs and your toe kicks still in front of it. Try the next one.
Choosing a kitchen floor, and getting it right
Worth knowing whether or not you use our tool.
Decide the cabinets first. There are far more floors in the world than there are cabinet colors you are seriously considering. Narrow the cabinets to two or three, then bring floors to them. Doing it the other way around means re-testing everything twice.
Look at the undertone, not the color. Most floor disappointments are undertone clashes rather than color clashes. A gray floor with a green undertone next to cabinets with a blue undertone will feel subtly wrong, and most people cannot say why. Put the sample flat on the ground next to a cabinet door, in daylight, and look at them together.
Think about the direction before you think about the material. Which way the planks run is free to decide and expensive to change. The usual advice is to run planks along the longest wall, or towards the main light source, but in a kitchen it is often better to run them in the direction you walk, so the joints are not fighting the traffic.
Be realistic about maintenance in a kitchen. This room gets water, grease and dropped pans. Solid wood is beautiful and moves with humidity. Textured tiles hold grease in the texture. Very dark floors and very light floors both show everything, dark ones showing dust and light ones showing crumbs. Mid-tone, lightly varied floors hide the most.
Check the height. Adding a floor on top of an existing one raises the level, and that has consequences: the dishwasher may no longer slide out from under the countertop, and doors may need trimming. Worth checking before you fall in love with something thick.
Decide where the floor stops. This is the detail people forget until the installer asks. If your kitchen opens into a hallway or a dining room, you either run the same floor through, which makes both spaces feel bigger and commits you to one material, or you stop at the threshold, which needs a trim strip and a decision about which side the line falls. Standing in the doorway and looking at where the change would land is worth doing before you order anything.
Get a bigger sample than they offer you. Most suppliers will let you take home more than one piece. Lay several down together, in the actual room, and leave them there for a few days. Look at them in the morning and at night. That is the closest physical equivalent of what this tool does on screen, and doing both is better than doing either.
The same floor plan, six different floors
These are demonstration kitchens, not customer photos. Each starting room was generated, and every result below is the real Change Flooring output run on it, with nothing retouched afterwards.
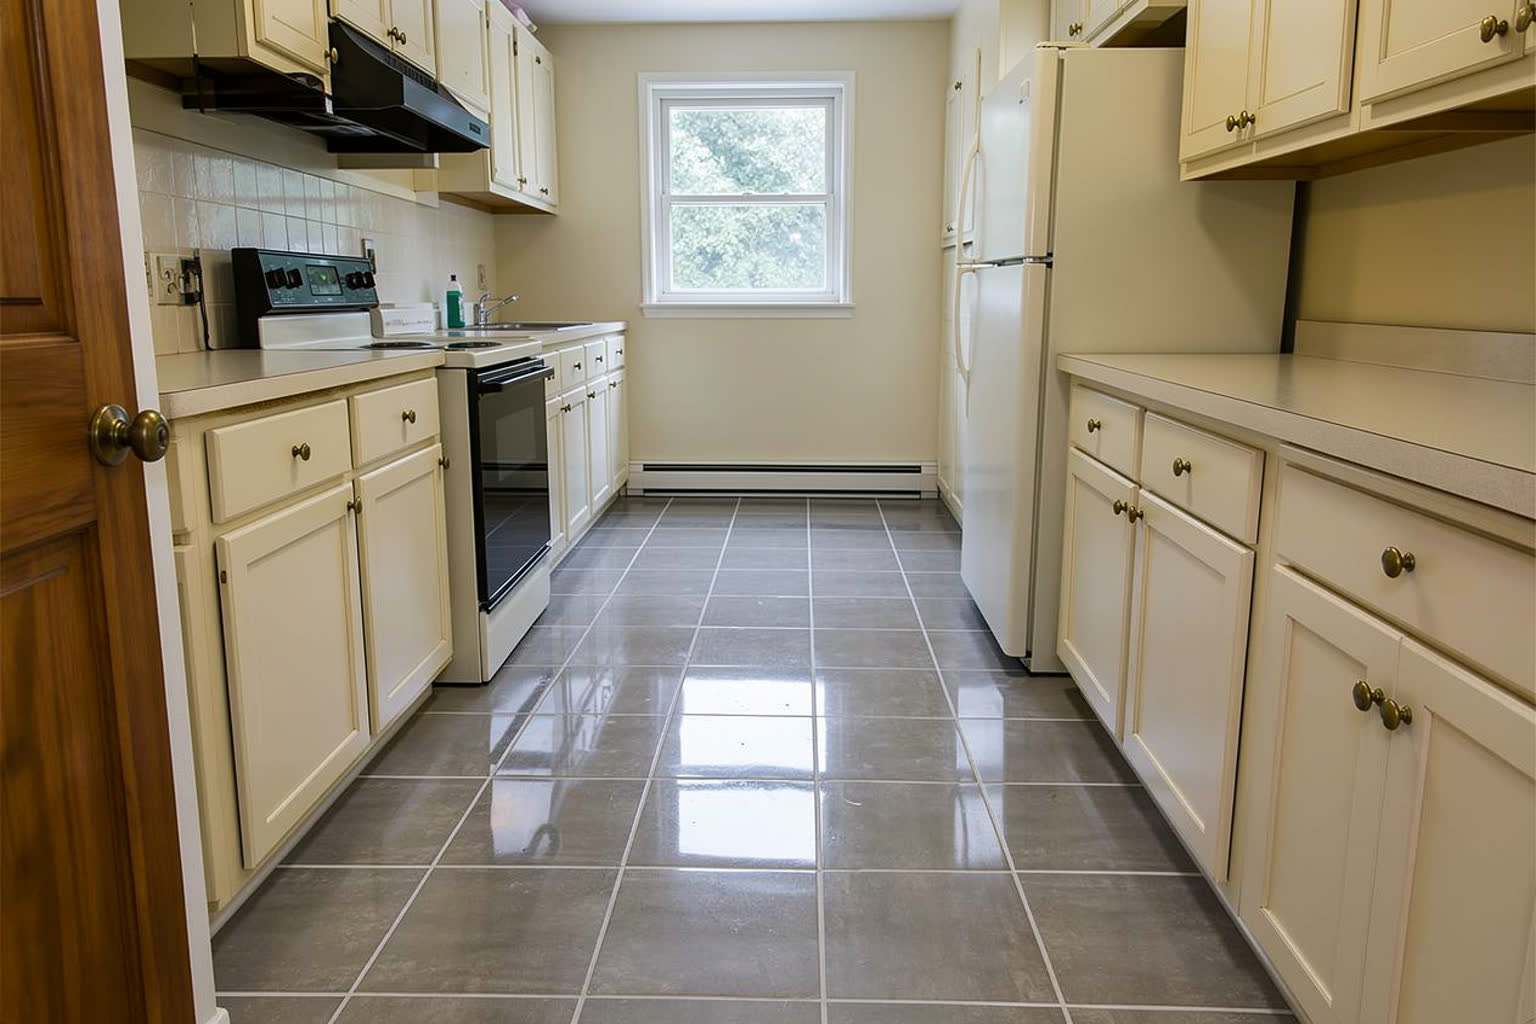
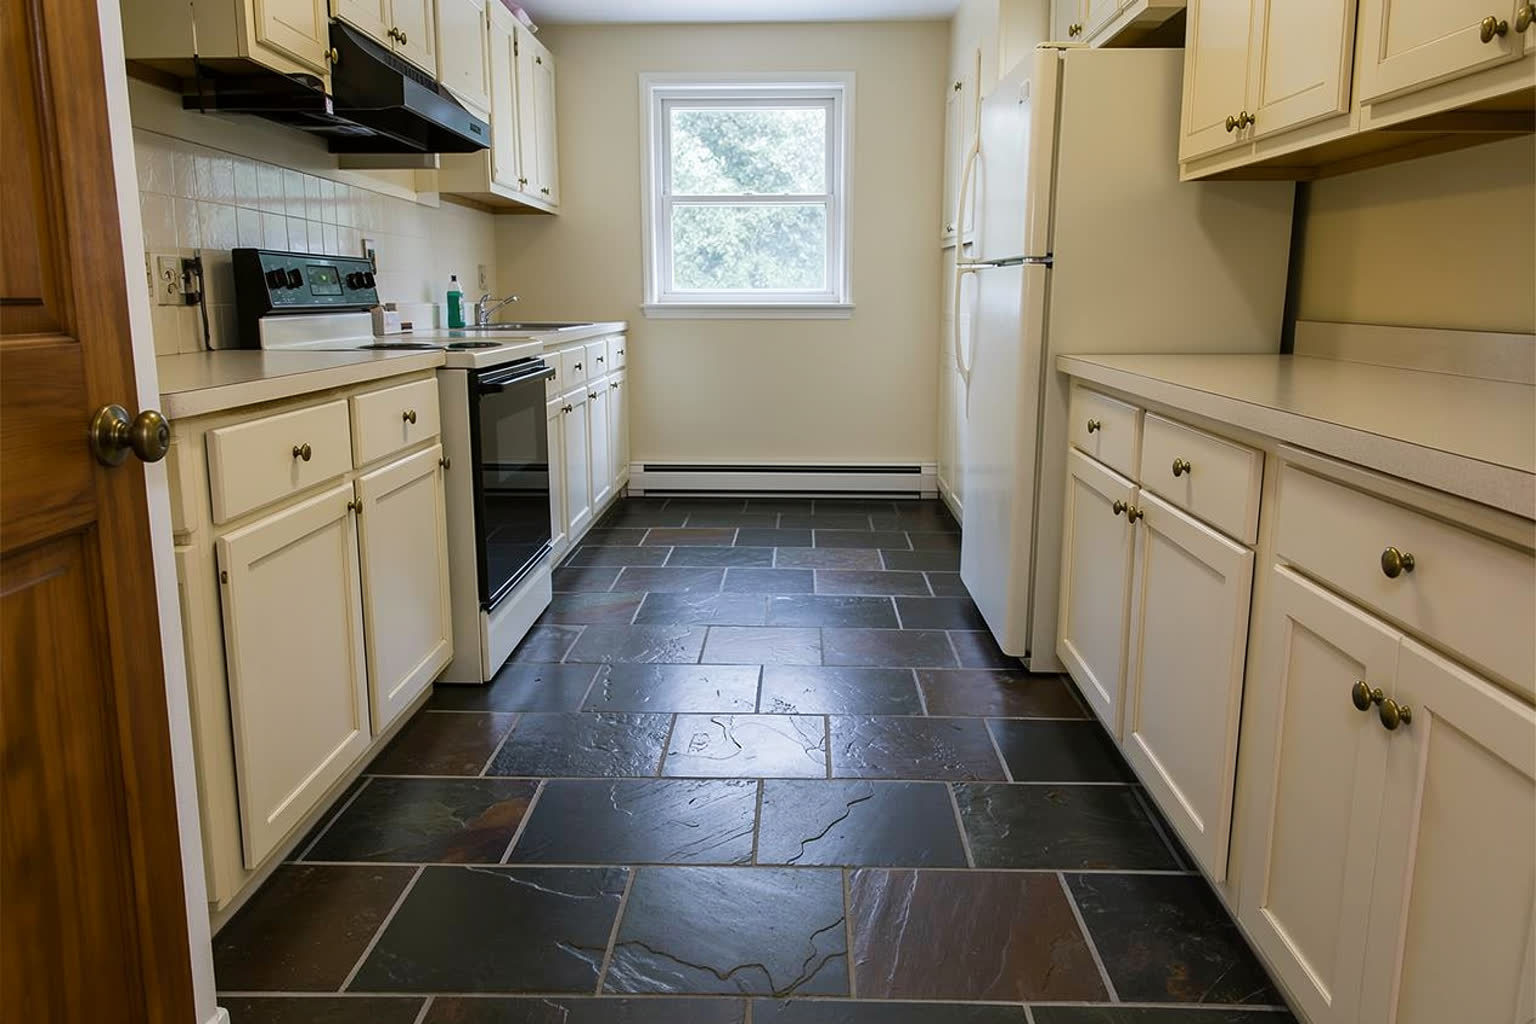
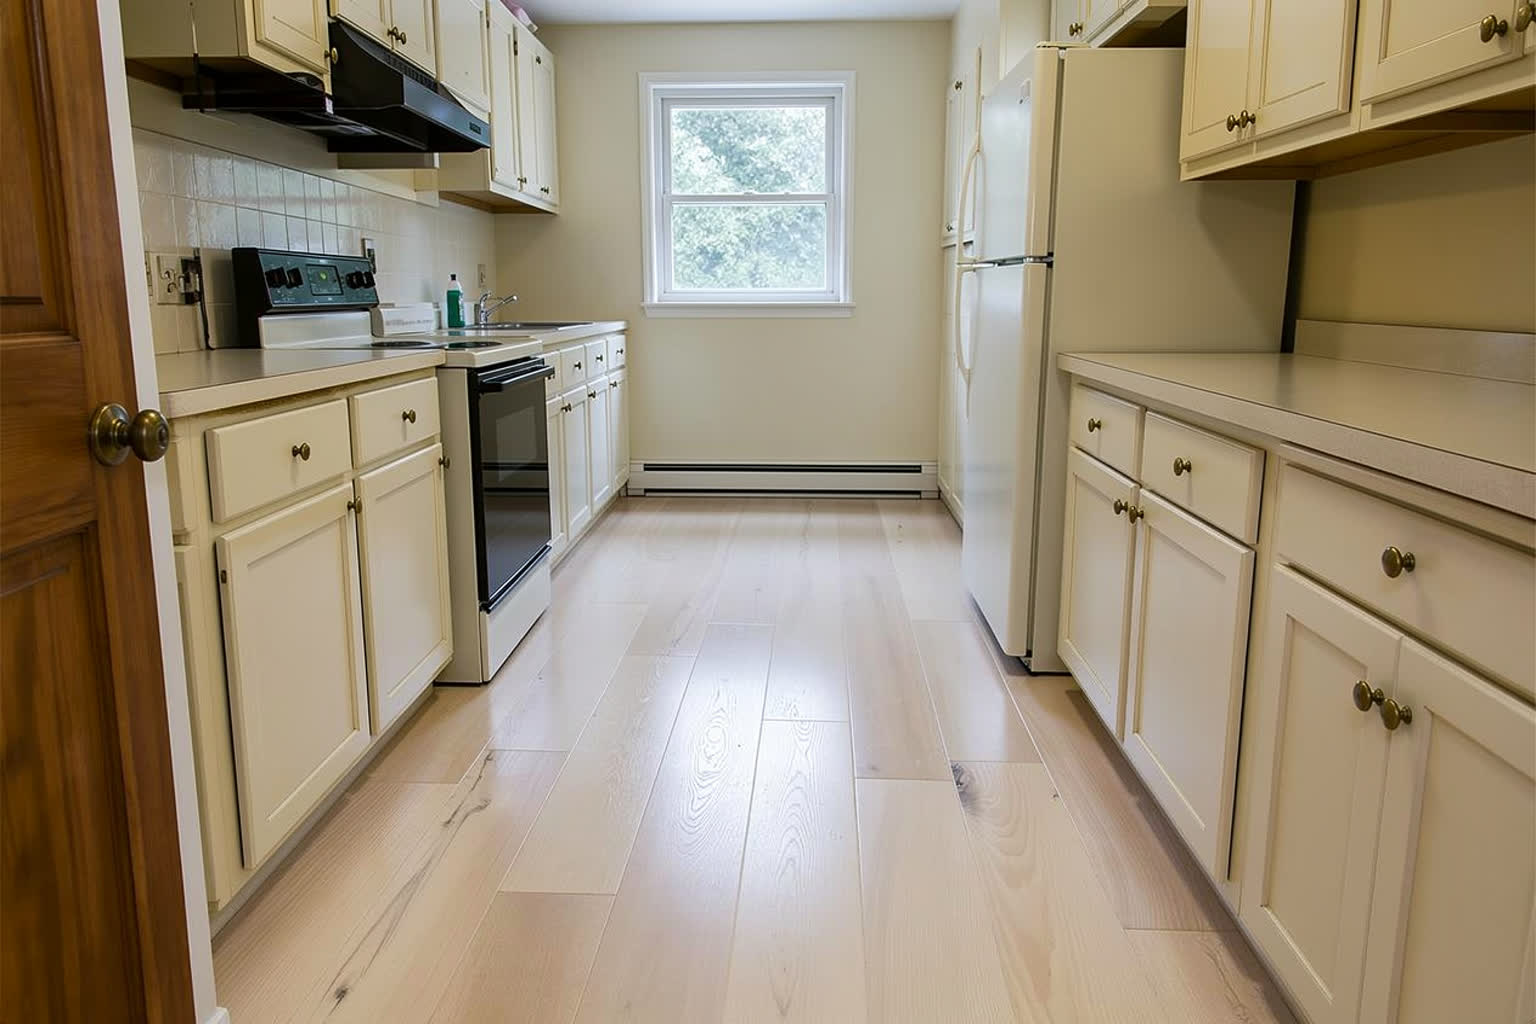
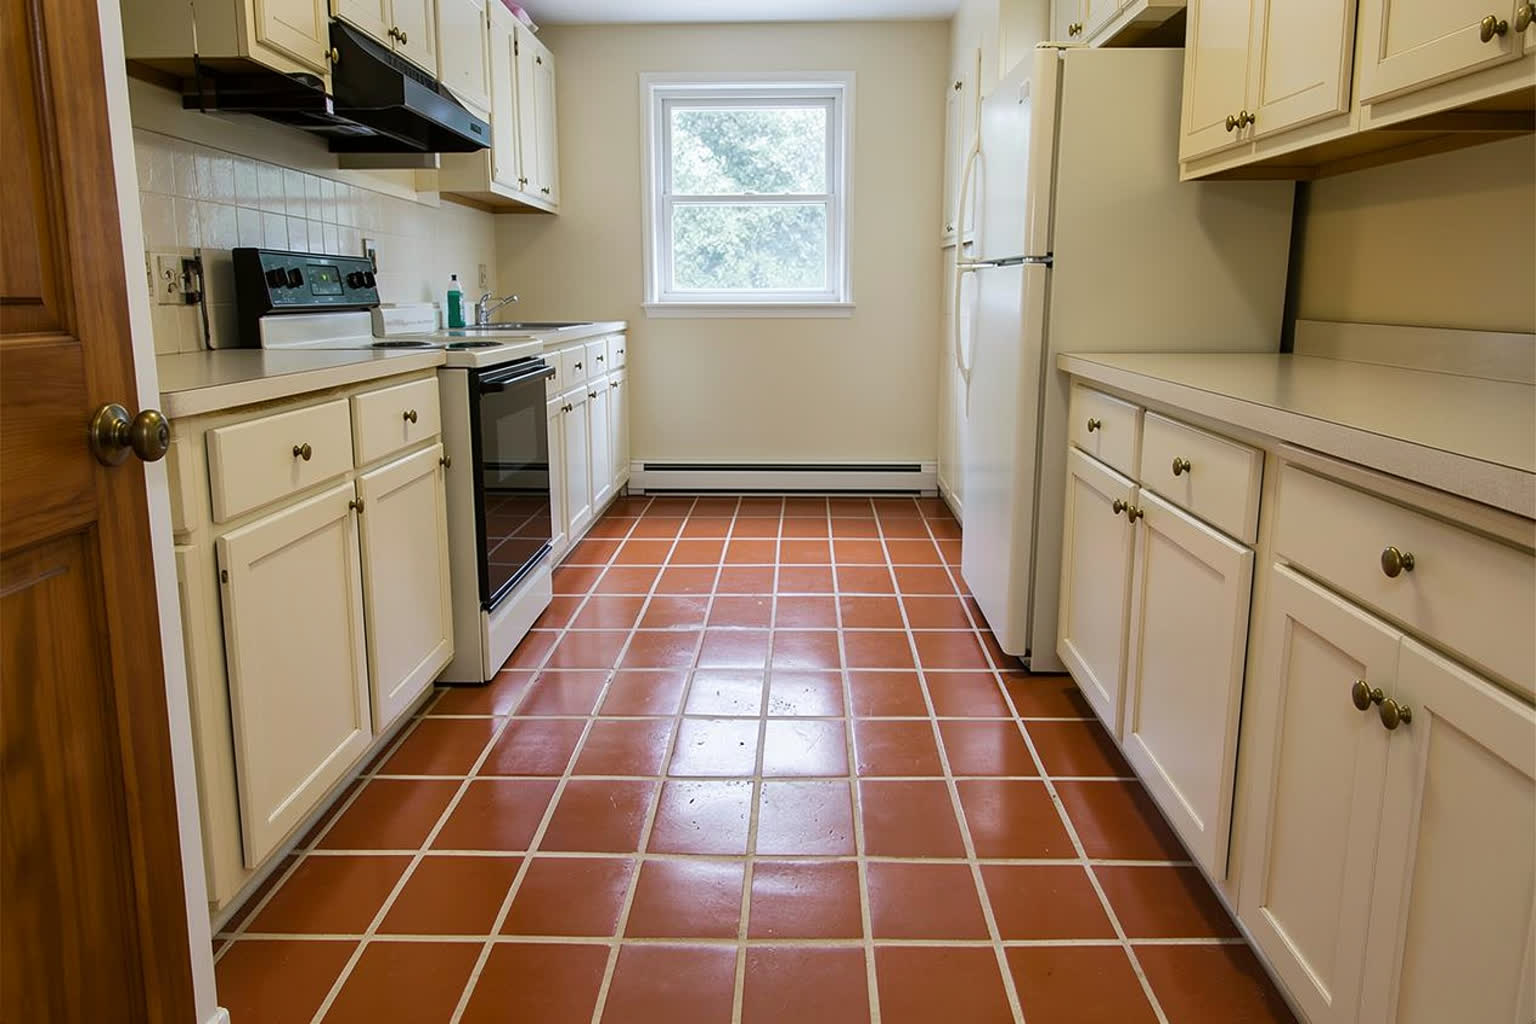
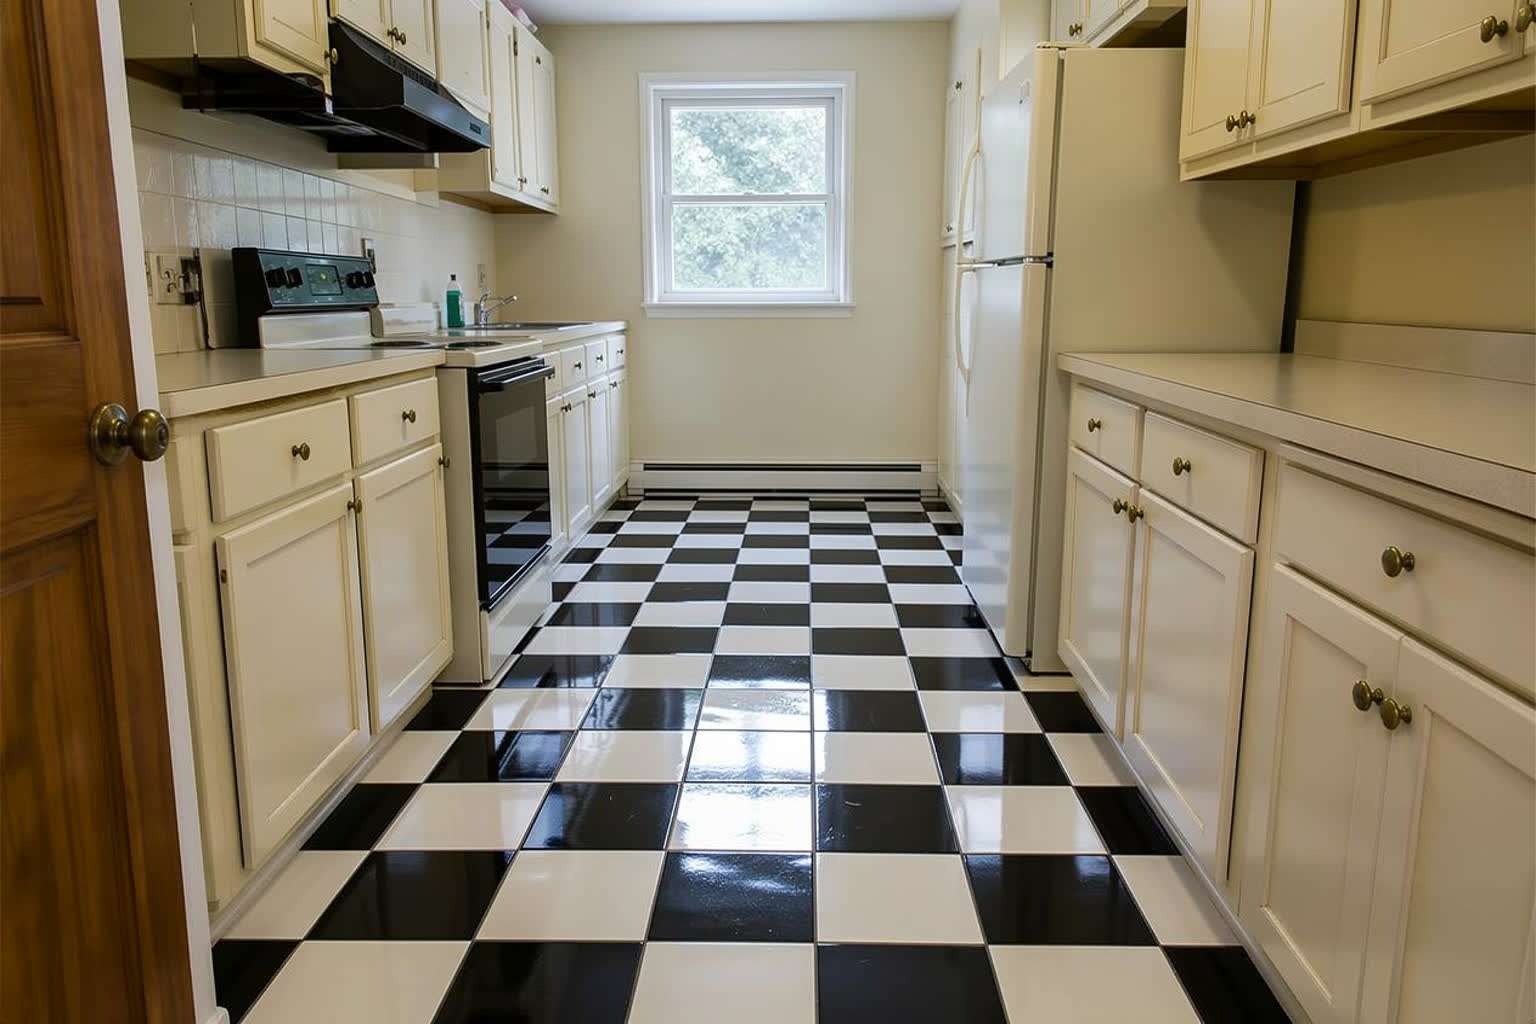
The floor is the largest surface in the room and the worst one to change your mind about.
Questions people ask
Does it change anything except the floor?
No. The tool is instructed to replace the floor plane only, and to leave everything above it pixel-identical. Rugs, toe kicks, appliance bases and furniture legs are excluded, so they sit correctly on top of the new floor rather than being tiled over.
Will the planks run the right way?
It projects the material in the correct perspective for your photo, at a realistic plank or tile scale. Direction matters more than people expect: planks running the length of a room make it feel longer, and running them across makes it feel wider.
Can I test a specific floor from a specific store?
Yes. Photograph the sample and upload it. Shoot it flat and in daylight so the tone is honest, because floor samples photographed under warm store lighting read much yellower than they are.
Does it work for tile as well as wood?
Yes. Wood, engineered wood, laminate, vinyl, porcelain, ceramic and stone all work the same way. You are supplying a texture, and it lays that texture on your floor.
Should I decide the floor before or after the cabinets?
Usually after. The floor has to live with the cabinets, and there are far more floors than there are cabinet colors you are seriously considering. Narrow the cabinets down first, then test floors against your shortlist.
Will it tell me how much flooring to order?
No. It shows you what a floor looks like, not how much of it you need. Measure the room and ask your supplier, and add the usual allowance for cuts and waste, which is higher for diagonal and herringbone layouts.
What to look at next
Cabinet Painter
The floor and the cabinets are the two biggest surfaces. Settle the cabinets first, then bring the floor to them.
Change Backsplash
The other surface that has to agree with both. Test it once the floor is decided.
Material Swap
The countertop is the other surface competing for attention. Judge the pair together.
Redesign
If the floor is one part of replacing the whole kitchen, see the room as a whole instead.
Now put the floor in your own kitchen
Photograph the plank or the tile you are considering, upload a photo of your room, and see it down before you pay anyone to lay it.
One photo. About a minute. Your room, not this one.